
Procedural Cactus

I have been trying to procedurally generate cactuses. You can see the results here (refresh the page to get a new cactus). This was made mostly as a learning experience but it could have applications in a game. If a game had a dessert and needed a large amount of cactus models for example.

It was made with three.js and WebGl. The source code is available here.

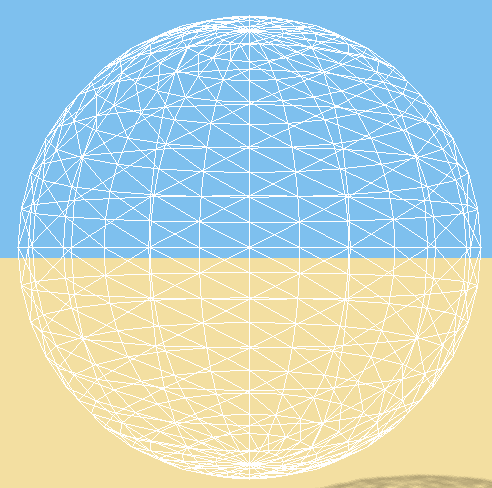
To make the cactus we start with a UV sphere. The actual sphere has a lot more vertices, but mostly looks like the picture below.

Next we have to rough it up a bit. We loop through the vertices with 3 things to do. First, make the vertical knots going down the cactus. Second is to save the vertices were we want to add spines. Finally we want to add a bit of randomness to our cactus as we go down it.

To make the knots we just pull out all of the vertices that have an index that is a multiple of 4. Because of the way we ordered the vertices these will be in vertical lines going down.

As we are pulling out each vertex we check if  we want it as a spike location . If so we add it to an array and pull out the vertex a little more.

Finally as we are going down the cactus we move every thing in or out using a random walk. This gives us some randomness and makes everything seem more natural. After these 3 steps we get something like this. 
This is rendered with normal colors. A handy feature three.js has for debugging
After this we loop through the spine vertices and add a small cone to each one. Three.js has a cone geometry that we can use with out much additional hassle.
The only thing we have left to do to the geometry is scale it. We scale the x and z by the same random number. We then scale y by a larger random number to get a tall cactus that doesn't look like a ball.

All of the shaders and lights are handled by three.js. The cactus uses the built in lambert material. We color the vertices of the spikes and knots to get a nice gradient.

Comments

Popular posts from this blog

Water Effect

This purpose of this post is to give some insight in to my 2d water effect. The effect  was made in unity and consist of one C# script and two shaders. Additionally this effect can be be broken down in to two parts. The reflection and the distortion. First we will look at the reflection Reflection A lot of the work of the reflection is done through the C# script. The script creates a new game object with the sprite renderer of the original object, mirrors it, and puts our water reflection shader on it. You can see it below. A couple things to note with this technique. First, everything done in this script could be done manually through the editor. It is only for convenience and does not have to be done at run time. You might want to add [ExecuteInEditMode] to this script if you plan on using it. Second, this is kind of a crude way of doing things. Animations, lighting, or anything else that effect your sprite will not get reflected. For animations you could use the script to

2d Book Distortion

The game I am working on allows the player to read and create magic books. Because of this, I decided it would be useful to create different effects that look liked they were happening on the book's pages. To do this I needed a normal map. I figured a book would not be too hard to model so I made this model in blender. Book Model The model didn't have to be perfect, because I only need it to render a normal map viewing it from the top. Normal Map That is all the work I needed to do in blender.  The art for the actual book is just for testing and I found it on open game art  here . I fudged with the normal map and the book art a little bit in gimp until they lined up nicely. The rest of the work I did in unity. Everything that  I wanted to appear on the pages I put on a separate layer, that I will be referring to as the page layer. This way I could render that layer with a separate camera. I ended up rendering that to a render texture that was applied to a

Chromatic Aberration

I made a chromatic aberration shader after not finding one I liked online. You can see the effect above on the sprite bottle to the right. My goal was to make a stylized chromatic aberration effect that I could apply to any sprite. The effect works by separating the rgb channels and displacing them in different directions. Below you can see the blue and red channels getting displaced in opposite directions on the x axis.  You can control the displacement easily with a script to change how extreme the effect is. I personally think the effect looks best when used subtlety but I could see some cool applications were it is controlled dynamically and combined with a screen shake or something to show a large impact. Here is the effect applied more subtlety on a cool rogue sprite Here is a link to the shader Here is an example C# script to control it