A lot of games use
Perlin Noise to generate maps, so I decided I would give it a try. One of the most popular games to do this is Minecraft which uses a similar noise function to create its map.
 |
| Landscape generated in MineCraft |
The basic premise is that you use the noise to create a height map on a 2d grid. Every point on a grid is assigned a random value and that value is its height. If you where to just use a normal random number function to assign the values they would be all over the place. It wouldn't make any natural looking shapes. That is why Perlin Noise is used. It creates smooth gradients between random points. This make the height changes less jarring and look natural.
 |
| Perlin noise vs white noise |
Unity already has a Perlin noise function so I did not have to implement my own. All I did at first was make a 2d array and assign each index a height value. Every height above a cutoff is land and everything below is water, this is the result.
It was a lot easier than I expected to start getting good looking shapes. After that I added more cutoffs just to make things interesting. I ended up having 6 different colors. They are suppose to represent deep water, water, sand, grass, rock, and snow. Here are some maps generated with those.


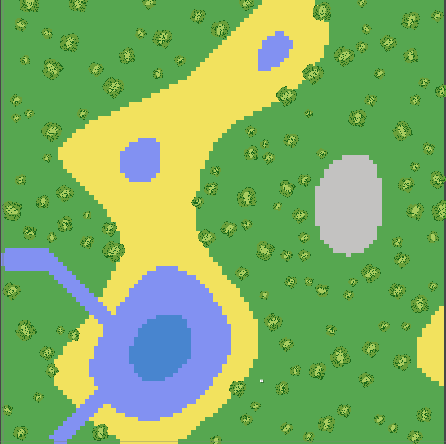
The next thing I decided to do was add some rivers. The first idea I had was to start generating rivers on high points and make them move down. The idea was that it would be like a river forming at a top of a mountain and then flowing down into a lake. It turned out that it looked more natural if I did the opposite and had rivers start at lakes and move upwards. The river function starts by looking for water in the array. Then when it finds it there is a chance to make a river. If it decides to make a river it moves to all adjacent spaces to determine if any of them have a height value higher than that of the current one. If it does it moves to the highest adjacent tile and keeps going recursively. It only stops if it hits the edge of the map or if there are no higher adjacent tiles. Before it makes the river it also chooses a random number in a small range to choose the width of the river. This way it can generate large rivers and little streams to make things look more natural.


 |
| If the river is high enough it will turn to an ice color |
Next I decided to add some trees. It picks a random place to put a tree and then if it is on grass and there are no other trees in the area it will put one down. It keeps doing this until it has generated a predetermined max number of trees or until it fails to find space for a tree after some many iterations. Each tree is also assigned a random scale and rotation. For the trees I just made a quick drawing.
 |
Tree Drawing
|
Right now I can only generate one chunk of the map but it should be possible to keep generating more and more chunks and they should flow together. When ever a river flows off the map it saves the location so the next chunk will know to start a river there. I think i'm going to use these maps for a top down exploring game so I will try to use this blog to track my progress.


To generate rivers, read up about flow-accumulation. Like this: http://grass.osgeo.org/grass64/manuals/r.terraflow.html
ReplyDeleteIt's a reasonably fast method used to calculate where actual river are in real world data, and it will provide you with the most realistic river-paths possible. As a side-effect you'll get all possible lakes (nevermind their altitude).
Yeah, this community can help beginners who want to build houses, clans , flags and many more stuff's in minecraft.
ReplyDeletePreviously I also face some difficulties while constructing houses in minecraft, Because minecraft is a square boxed game and if anyone wants to create circle in minecraft then it's not easy to make.
But now some of online tools are also available to create minecraft circle and any beginner can also use that if he/she is facing difficulty while creating circle.
I really loved reading your blog. It was very well authored and easy to understand. Unlike other blogs I have read which are really not that good.Thanks alot! Minecraft server list
ReplyDeleteI have read all the comments and suggestions posted by the visitors for this article are very fine,We will wait for your next article so only.Thanks! economy minecraft servers
ReplyDelete